Fawn Makeup tutorial
Intermediate level ⭑⭑
Slip into the skin of a real forest dweller with our Fawn make-up tutorial explained in just 4 steps.
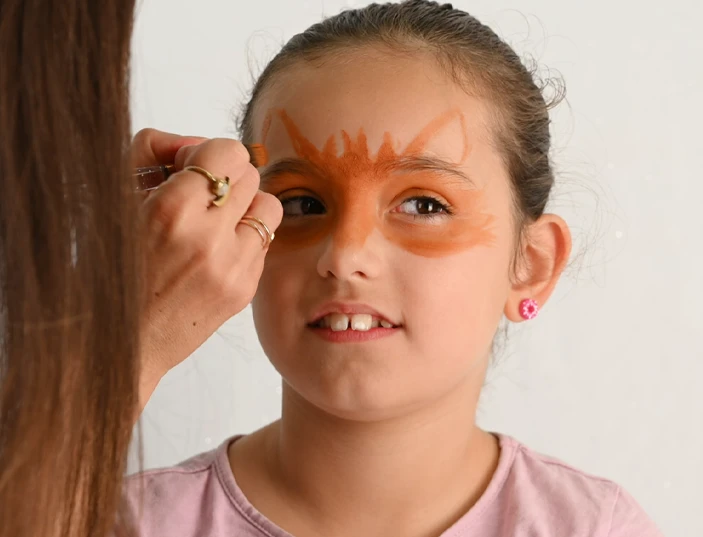
Step n°1
Take a thick brush. Moisten it and pick up some orange blush. Start by drawing a mask shape around the eyes, covering the mobile eyelids and stretching the color towards the temples. Extend the mask over the forehead and cheekbones, drawing irregular tips upwards to resemble a fawn's fur. Draw two small ears above the eyebrows.
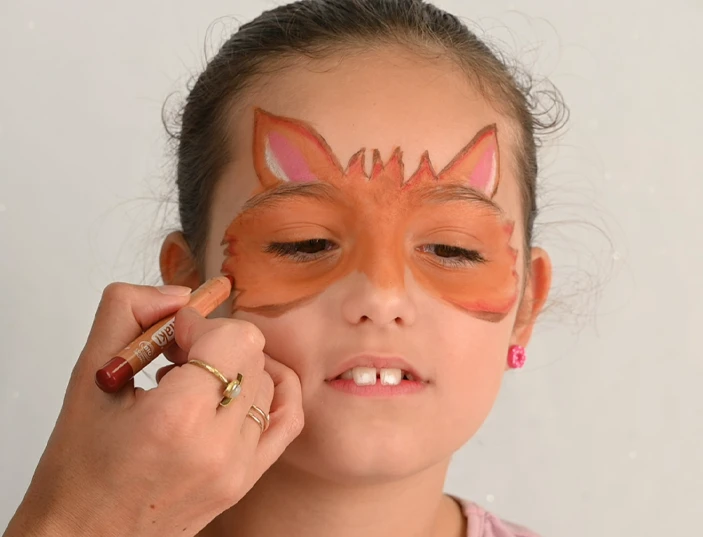
Step n°2
Take a fine brush. Dampen it and pick up some brown blush. Trace all the contours of the mask created in step 1, except for the nose. Using a pink jumbo pencil, color the inside of the ears. Then, to add relief, use a white jumbo pencil to highlight the outer edge of the ears. With a red jumbo pencil, iron in the contours drawn on the temples and cheeks.
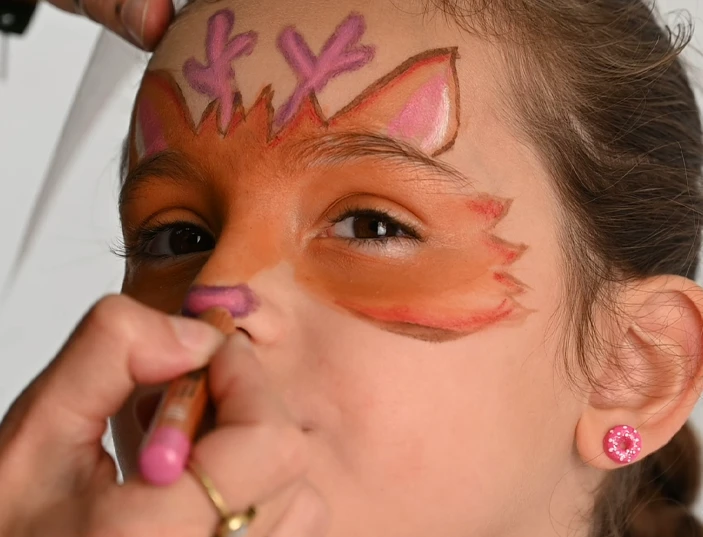
Step n°3
Take a purple jumbo pencil and draw the Fawn's muzzle at nose level. On the forehead, draw two horns to form antlers and color the inside with the pink jumbo pencil. Take the opportunity to color the muzzle as well.
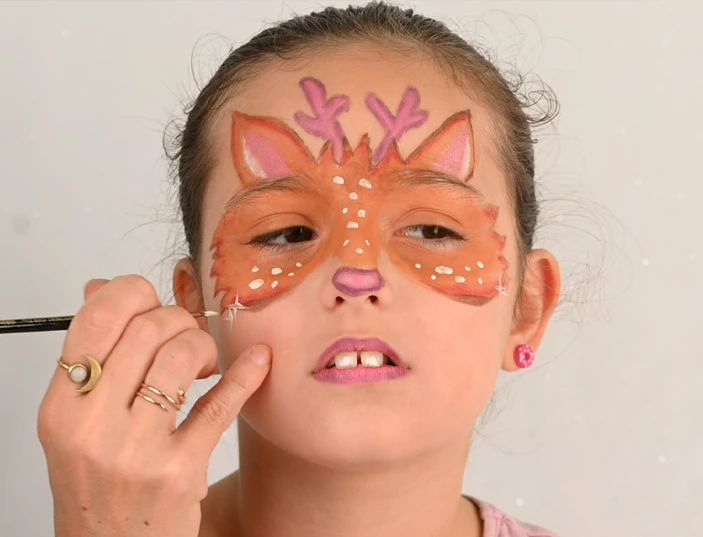
Step n°4
Take a fine brush. Dampen it and pick up some white blush. Draw small dots between the eyes and on the cheekbones. Use the pink and purple jumbo pencils to color the lips. Take the pink glitter pencil and stroke inside the ears and over the nose to add a little shimmer. Take your fine brush and pick up some white blush again. At the bottom of the mask, trace two small stars on either side of the face. Don't hesitate to go back over the contours in brown if they've faded a little.