Skeleton Makeup tutorial
Intermediate level ⭑⭑
Dive into the mysterious world of skeleton makeup tutorial! This simple step-by-step tutorial will guide you through the process of transforming your child into a striking skeleton. Follow our instructions and easily achieve this classic look, perfect for Halloween or any other spooky occasion.
Step n°1
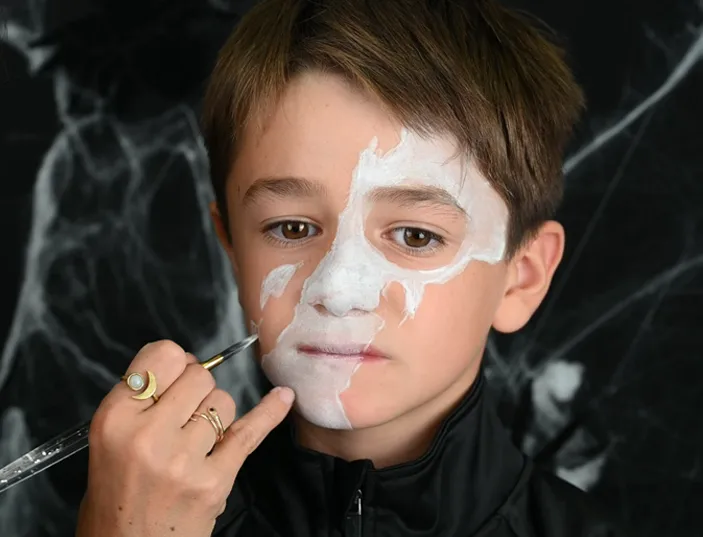
Take a slim white pencil. Trace the head of your skeleton on the diagonal of the face. On the left-hand side of the diagonal, draw two diamond shapes. Feel free to use irregular strokes to make the make-up more realistic. Use a thick brush. Moisten the brush. Pick up some white face paint. Paint the inside of the area you've just outlined, avoiding the eye area.
Step n°2
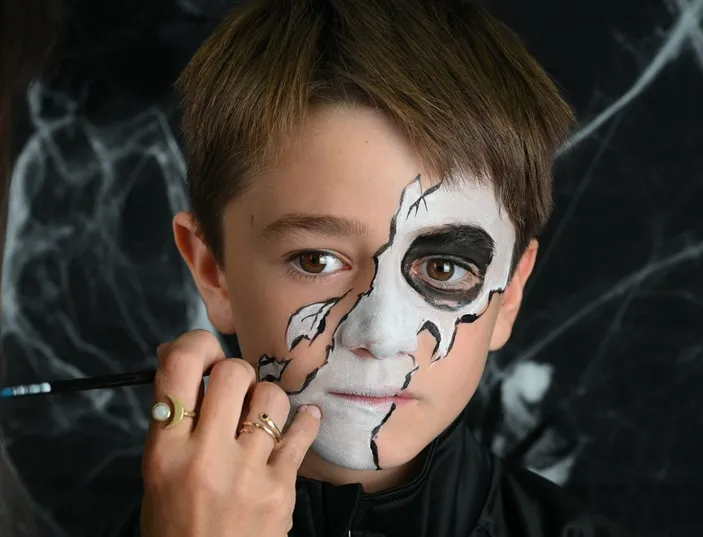
Using a black jumbo pencil, draw a black circle around the right eye. Use a fairly fine brush. Wet the brush. Pick up some black face paint. Fill in the black circle. Use a very fine brush. Still using the black face paint, outline your skeleton's head.
Step n°3
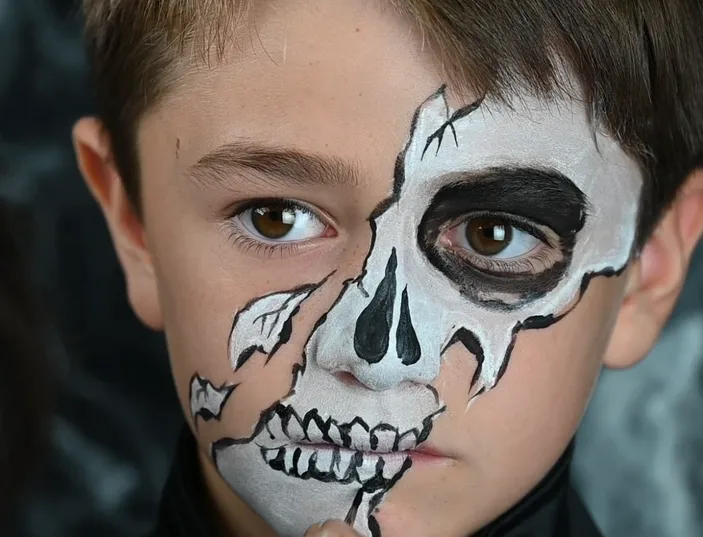
Again, using your fine brush, pick up some black face paint. On the tip of the nose, draw two drops side by side. The one on the left should be larger than the one on the right. Above and below the mouth, trace the teeth of your skeleton.
Step n°4
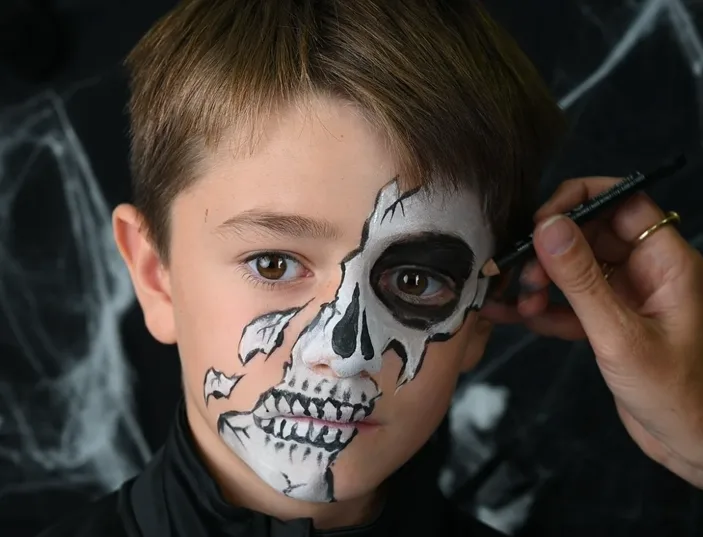
Take a slim black pencil. Draw small pencil lines above and below the teeth you've just created. Also draw lines in a few places on the make-up to give relief: on the forehead, the chin, to the right of the eye, to the left of the mouth and in the two shapes drawn alongside. Blend each line with your fingers.
Your cart is empty